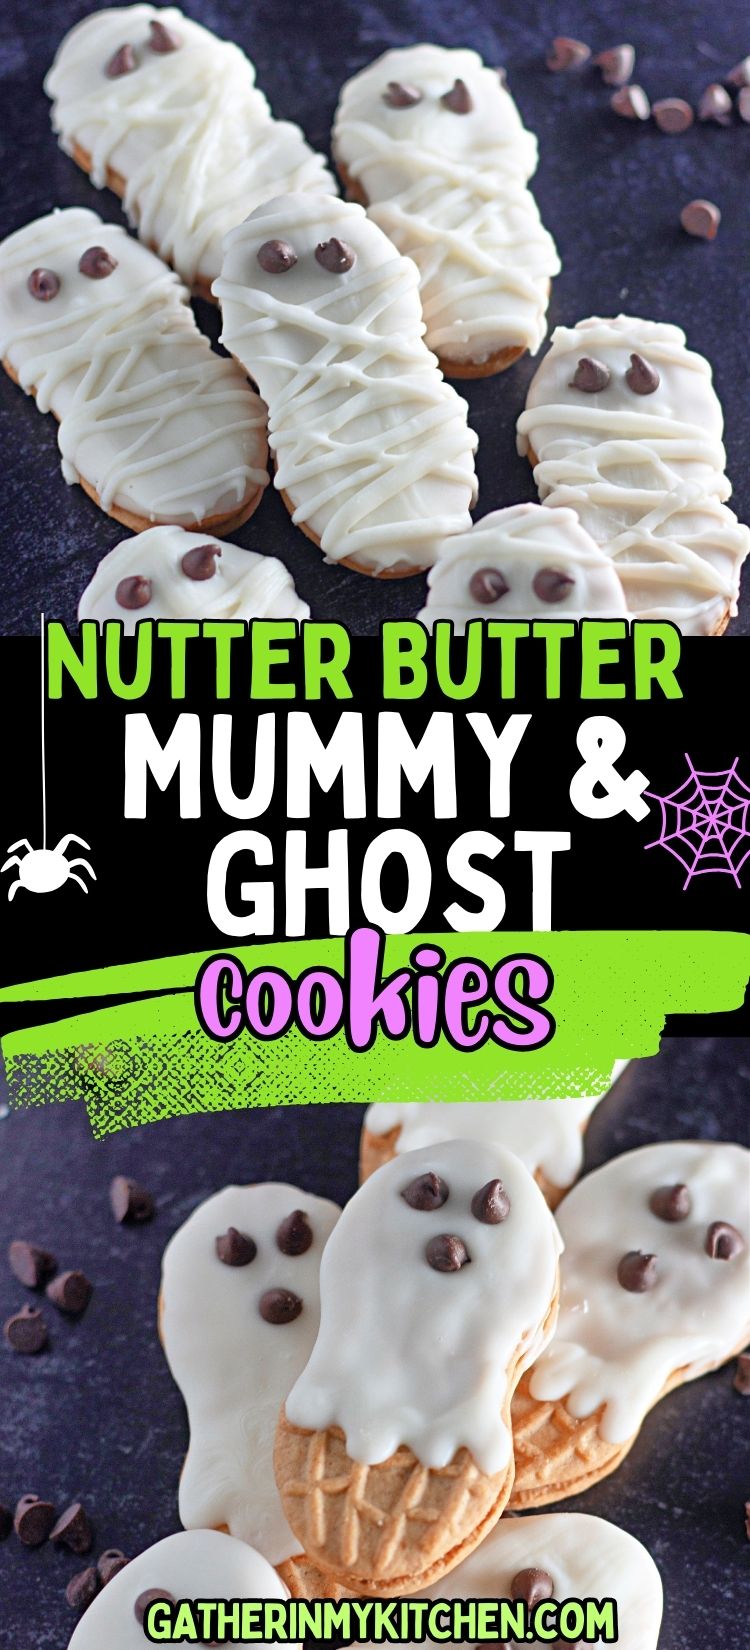
Dive into the Halloween spirit with these adorable Nutter Butter mummy and ghost cookies! A delightful blend of creamy vanilla coating and crunchy cookies, they're the perfect treat for your Halloween festivities.
Halloween Nutter Butter Mummy & Ghost Cookies
Halloween is all about creativity, and these Nutter Butter mummy and ghost cookies are a perfect example.
Using simple ingredients, you can transform classic Nutter Butter cookies into festive Halloween treats.
They're not only delicious but also fun to make, making them a great activity for kids and adults alike.
Whether you're hosting a Halloween party or just looking for a unique snack, these cookies are sure to be a hit.
Ingredients
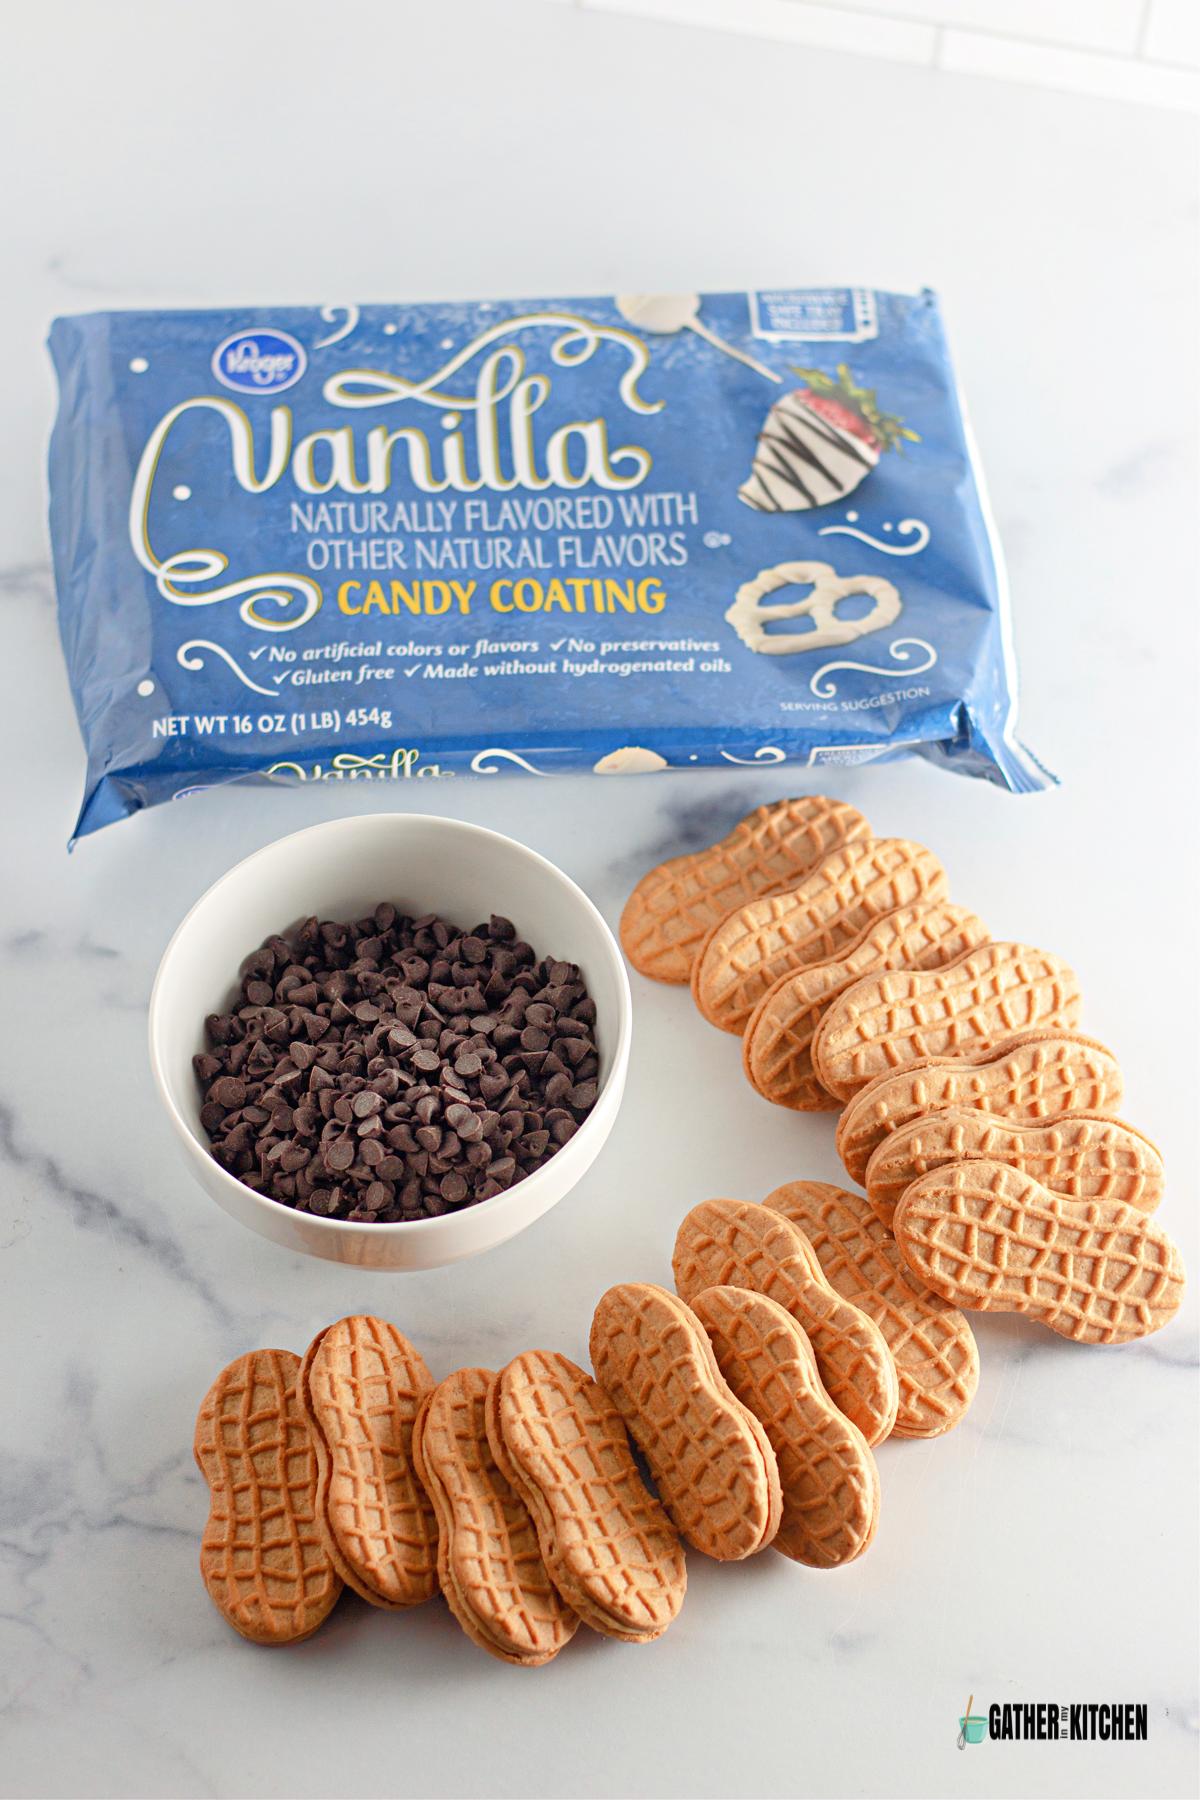
Vanilla candy coating or white melting chocolate - specifically look for candy coating meant for melting as it has a smoother texture than melting chocolate
Nutter Butter cookies - the peanut butter cookies are a classic base for these treats and give the mummies and ghosts a great shape. You could always sub them out for a different type of cookie if you prefer.
Mini chocolate chips - these make the eyeballs. You can find them in the baking aisle. If you want, you could also use eyeballs that are found near the sprinkles around Halloween time.
How to make
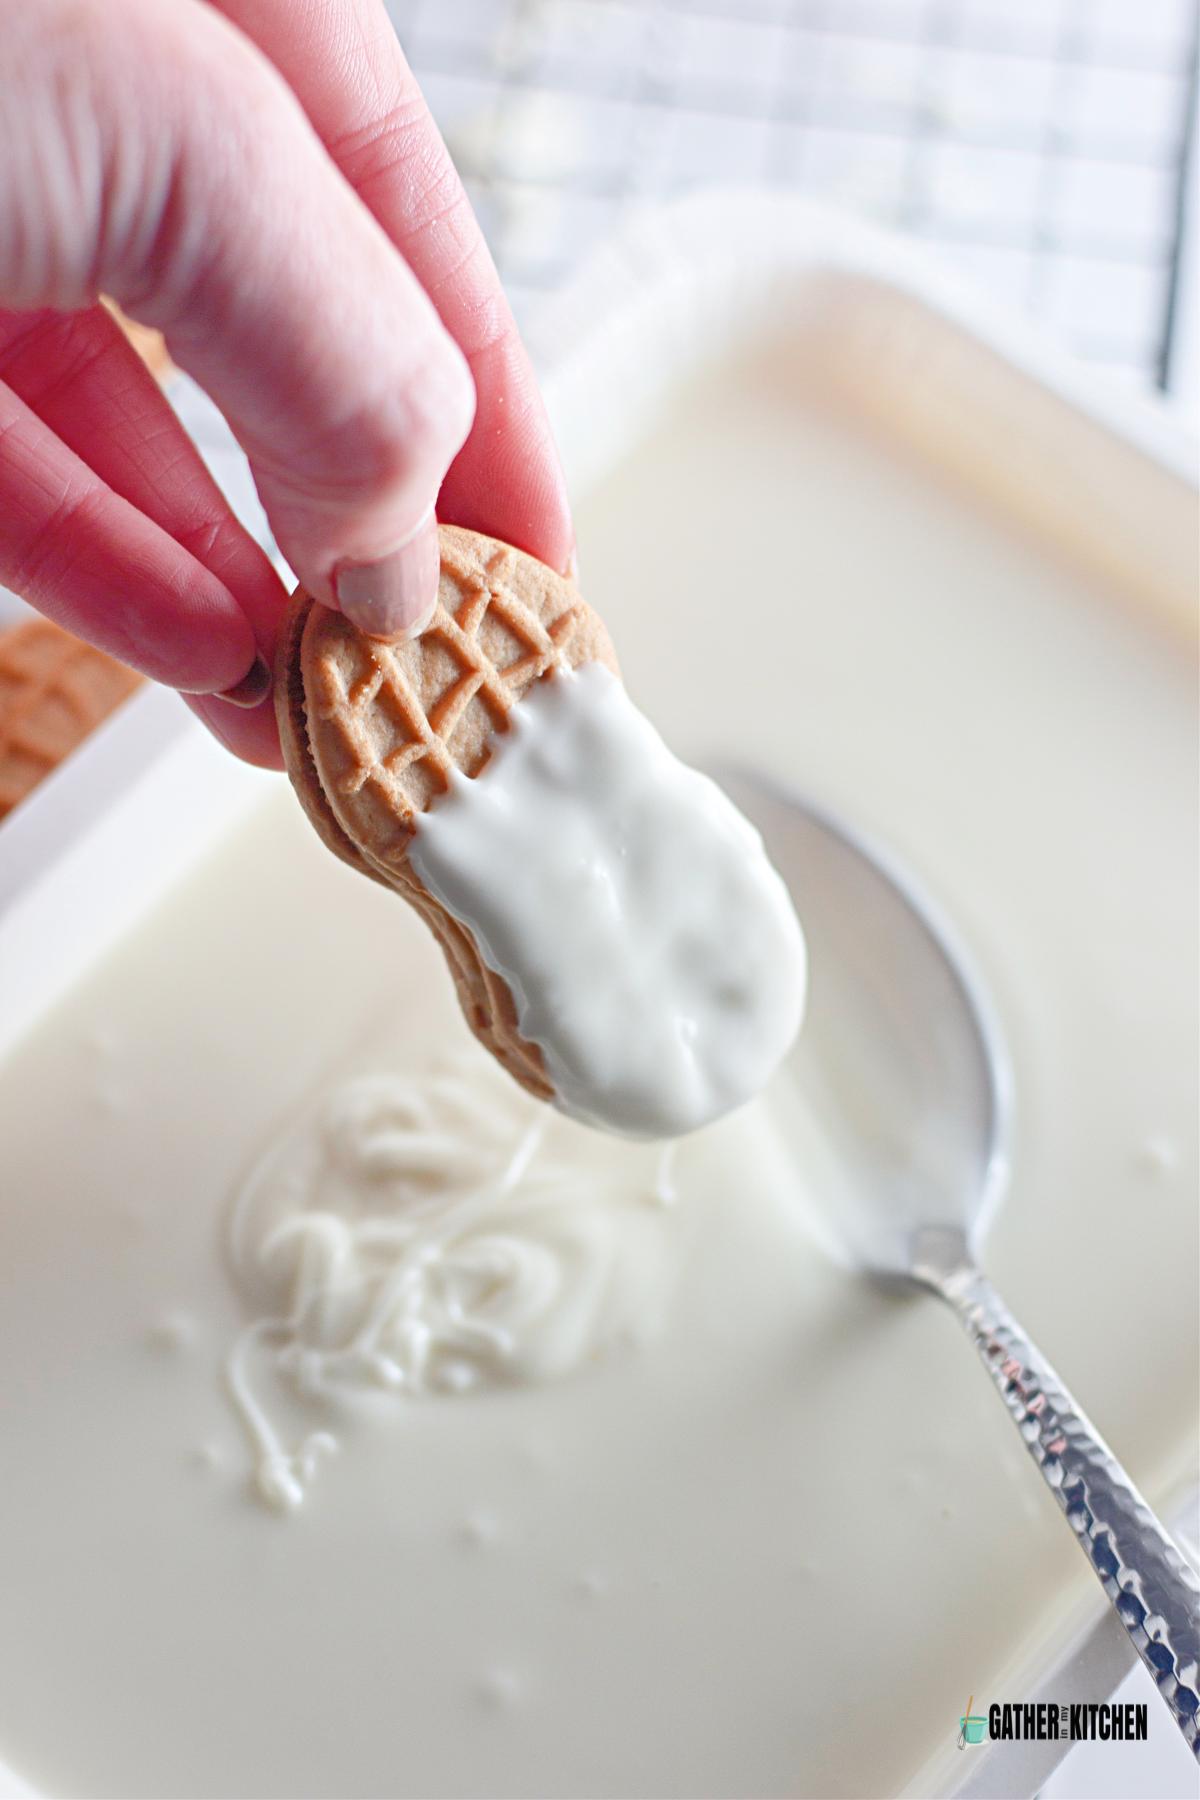
To make the Halloween Nutter Butter cookies, begin by melting the white candy coating according to package instructions. Scoop about ⅓ cup into a small zip-top bag for decorating.
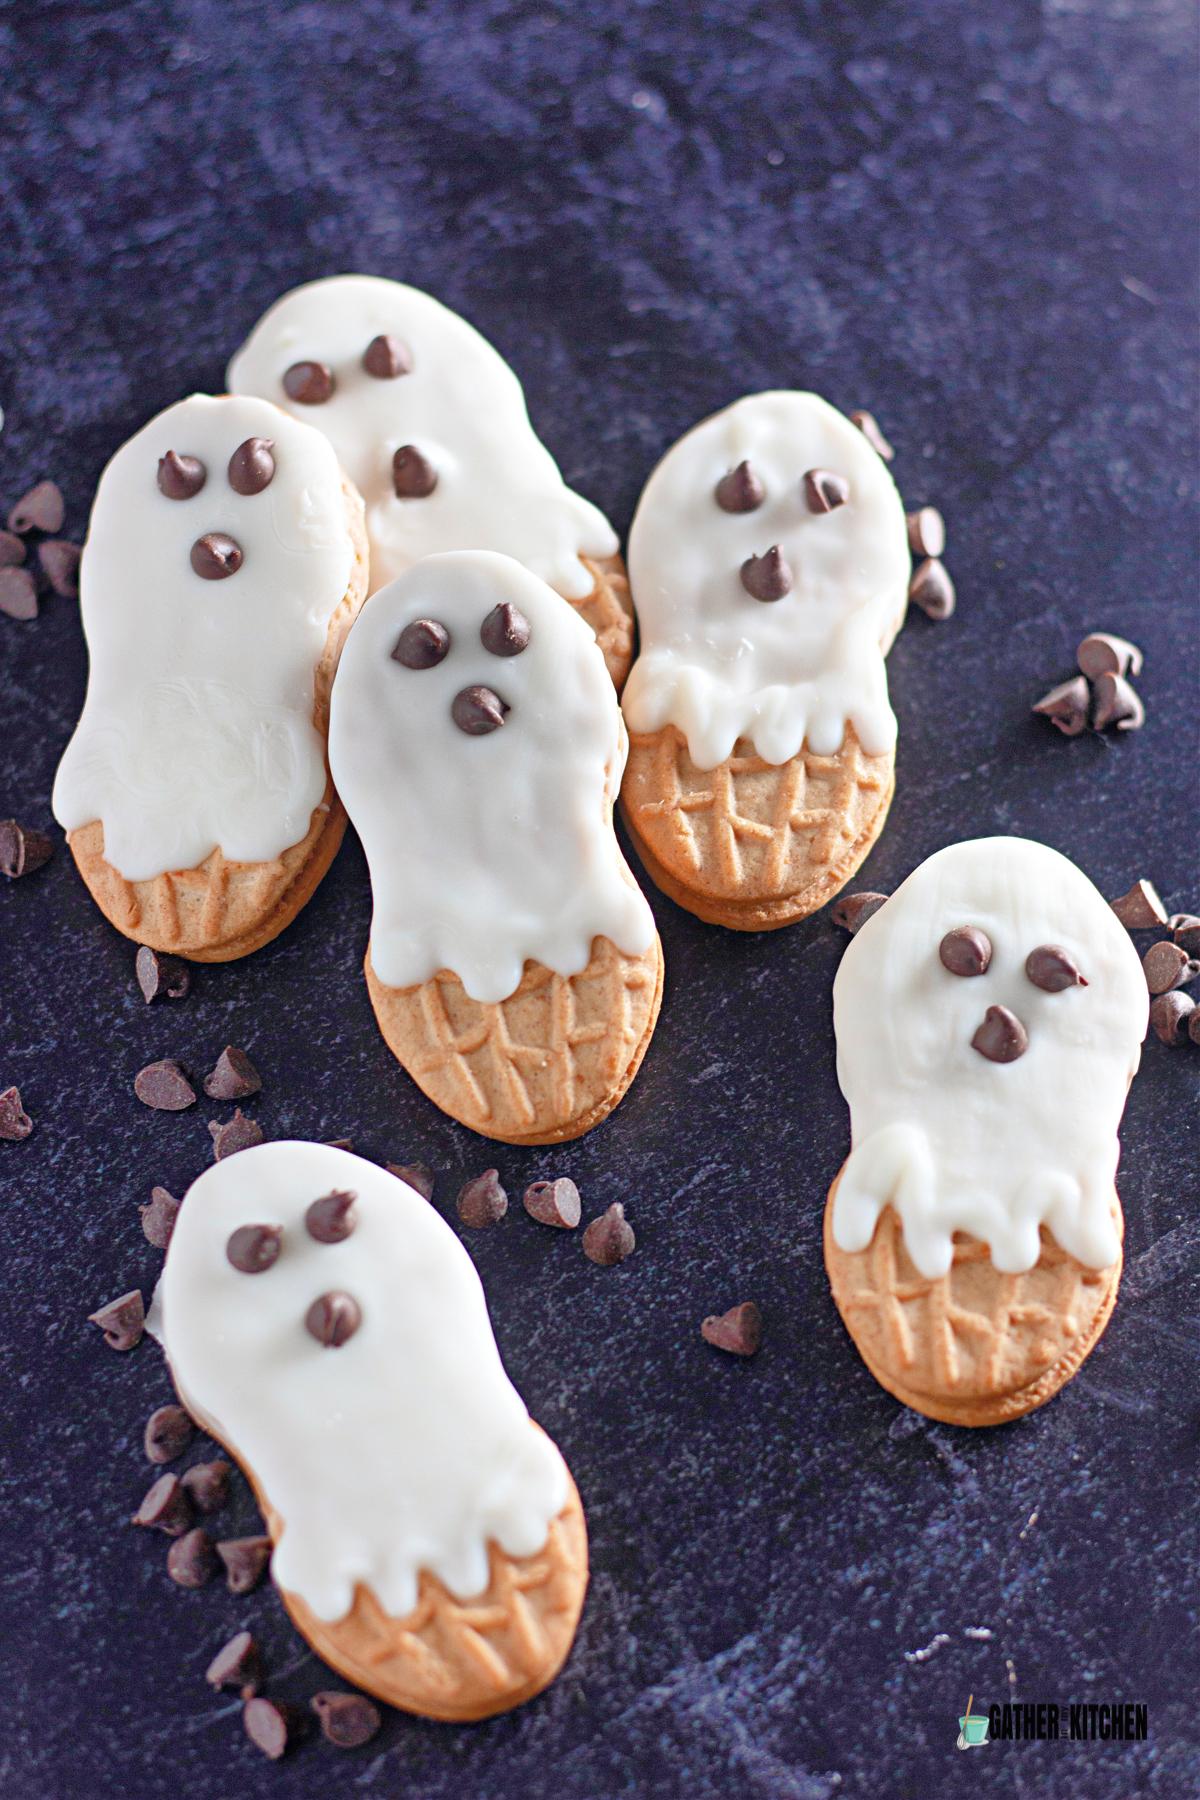
Carefully dip one side of each Nutter Butter cookie in the melted coating, dipping ghosts about ⅔ of the way up and leaving the bottom exposed. Place dipped cookies on a wire rack to set.

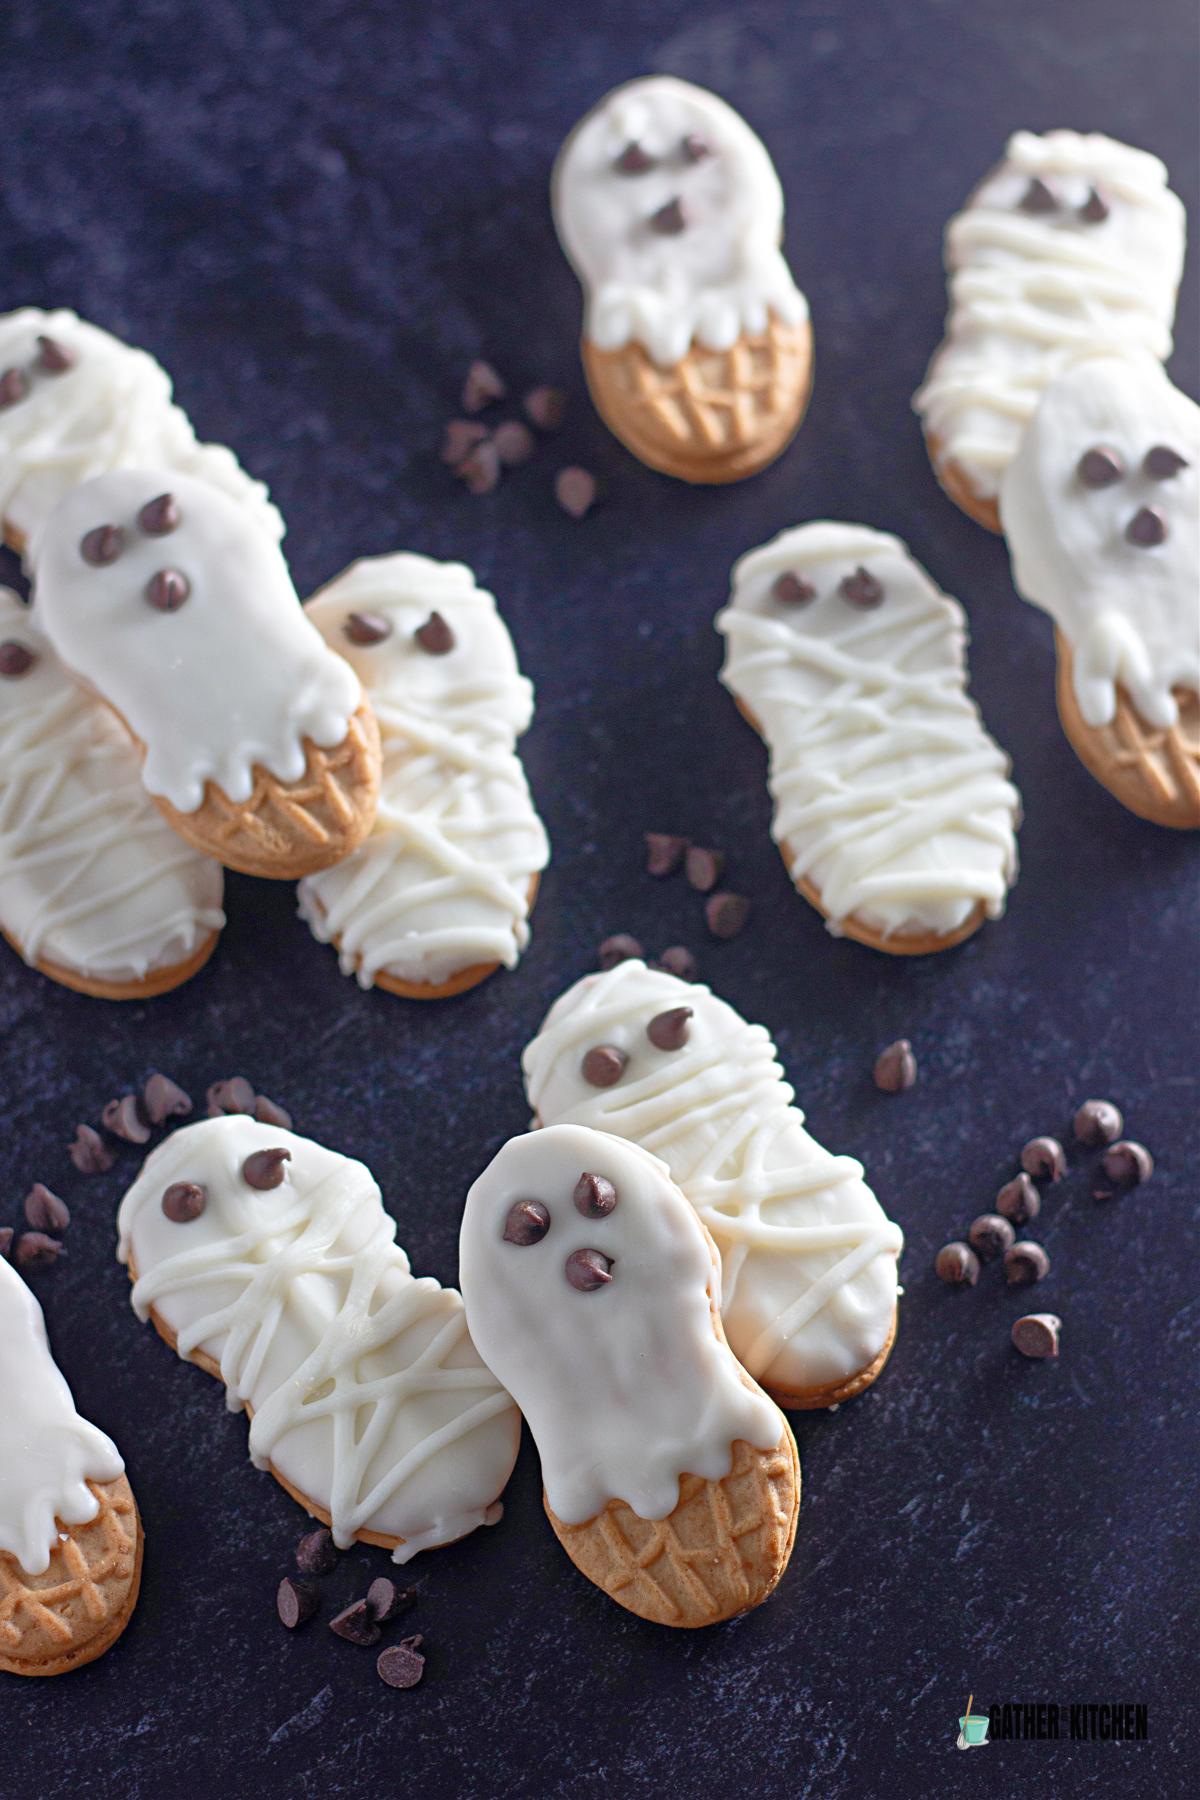
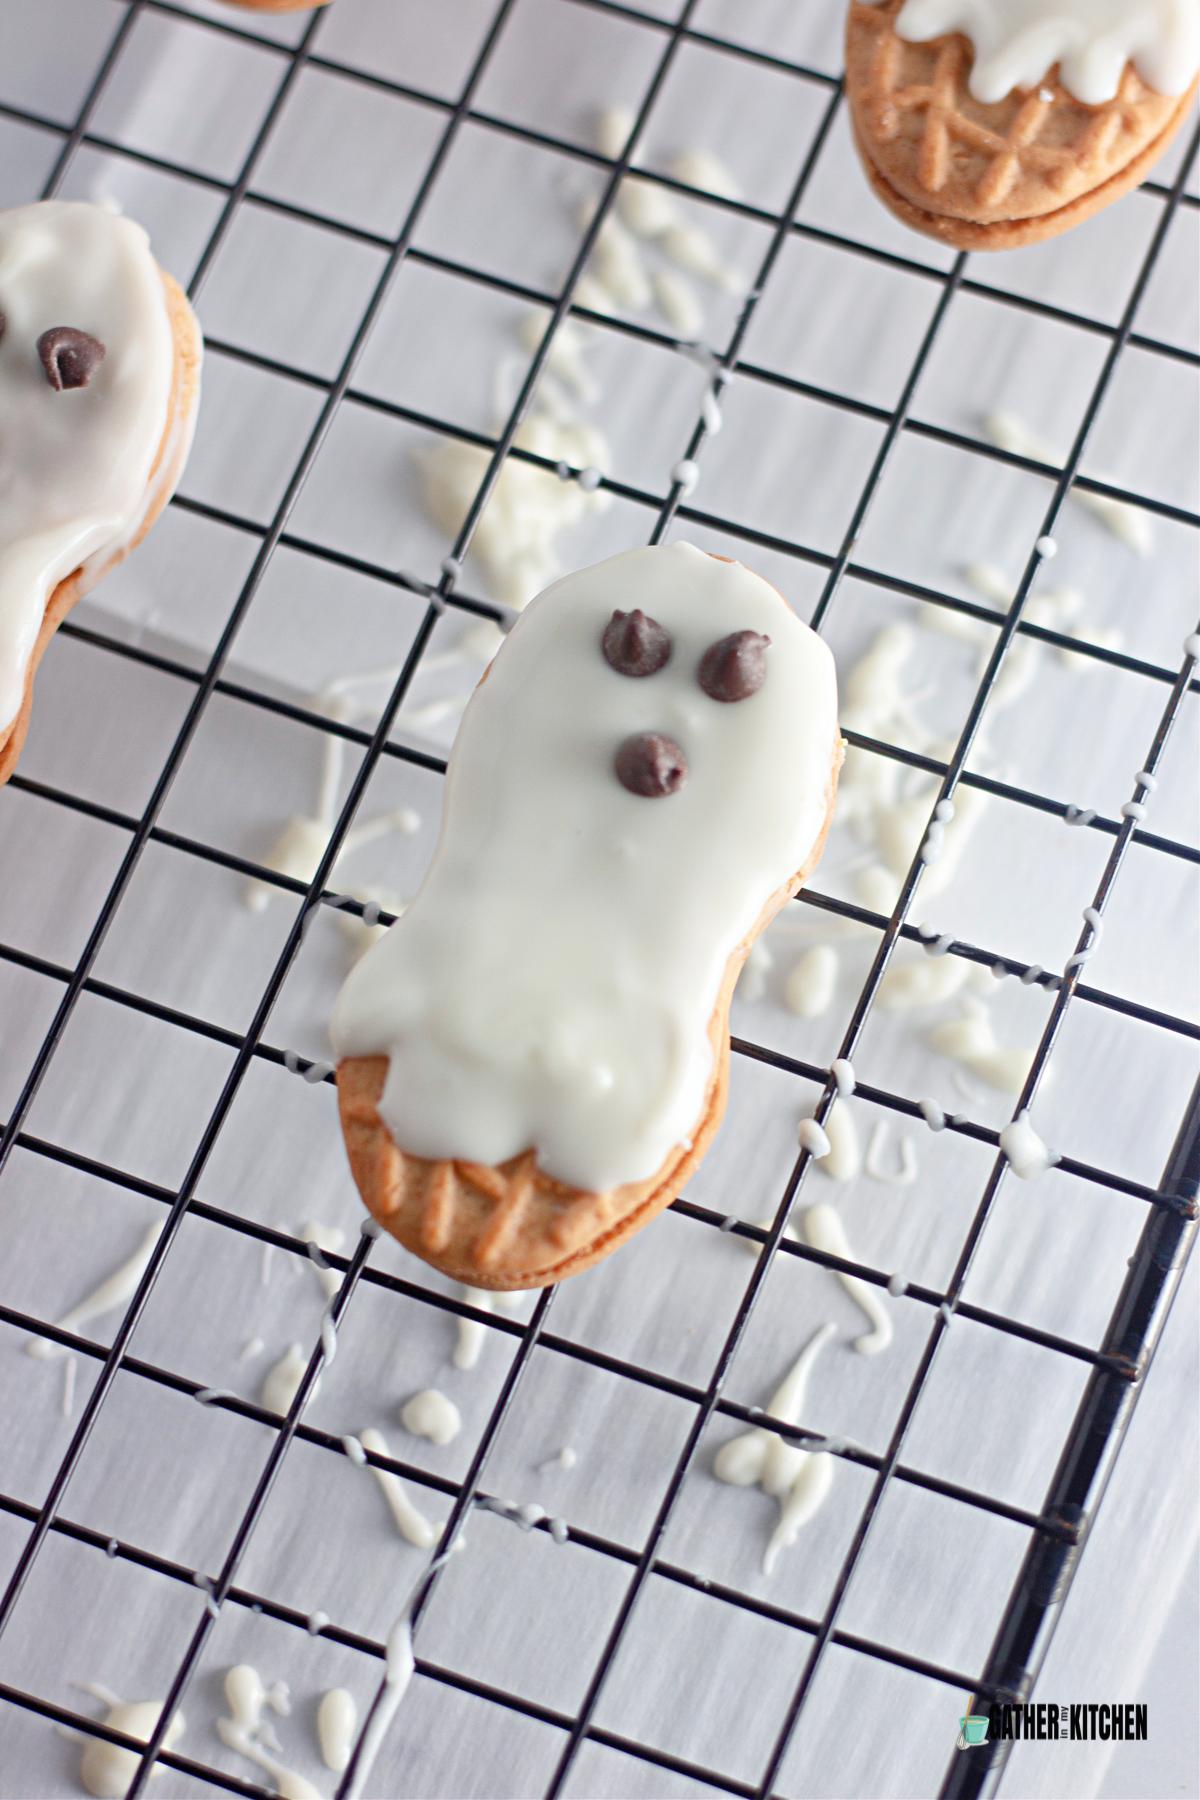
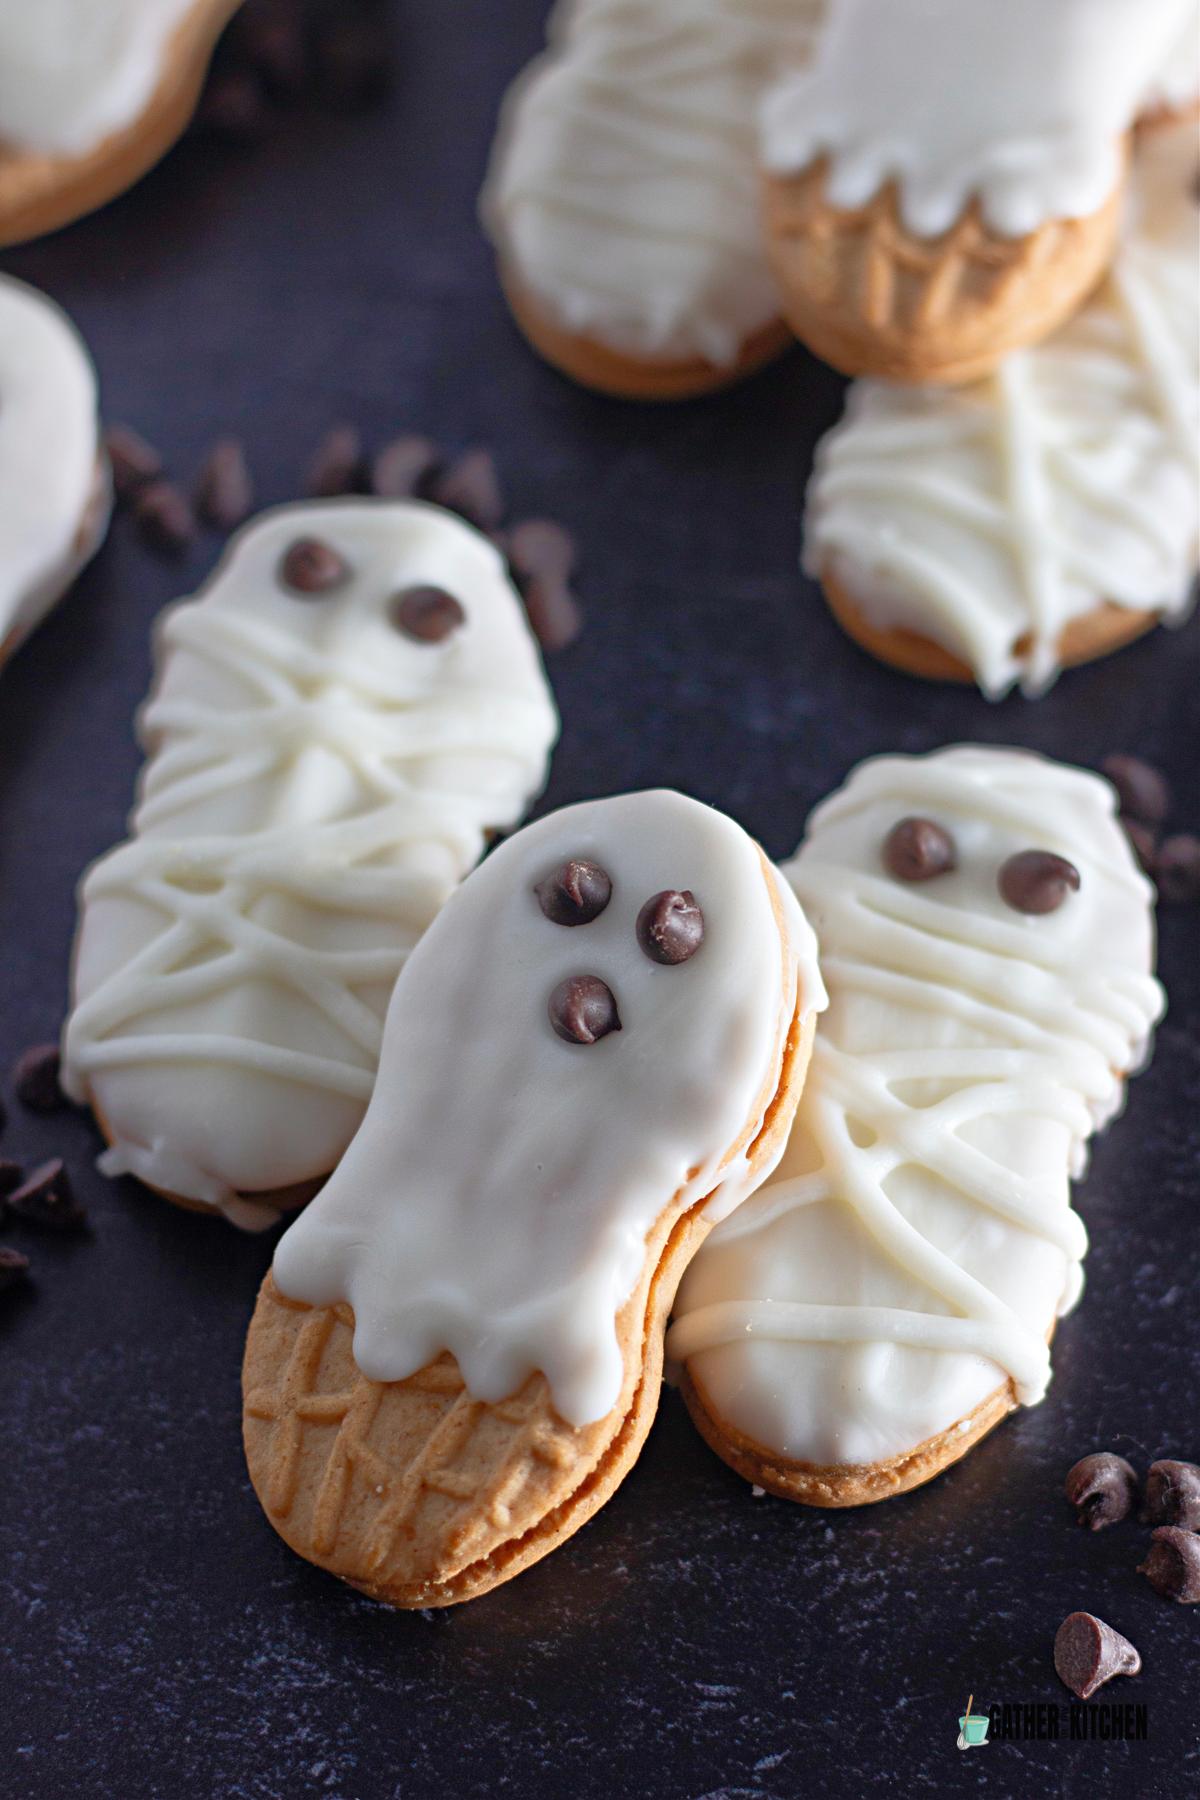
To Make Ghosts
Snip a tiny corner from the bag of melted coating to make a homemade piping bag. Before the coating sets on the ghosts, pipe a line of coating along the bottom edge to create the illusion of them floating. Add mini chocolate chips for eyes and mouths.

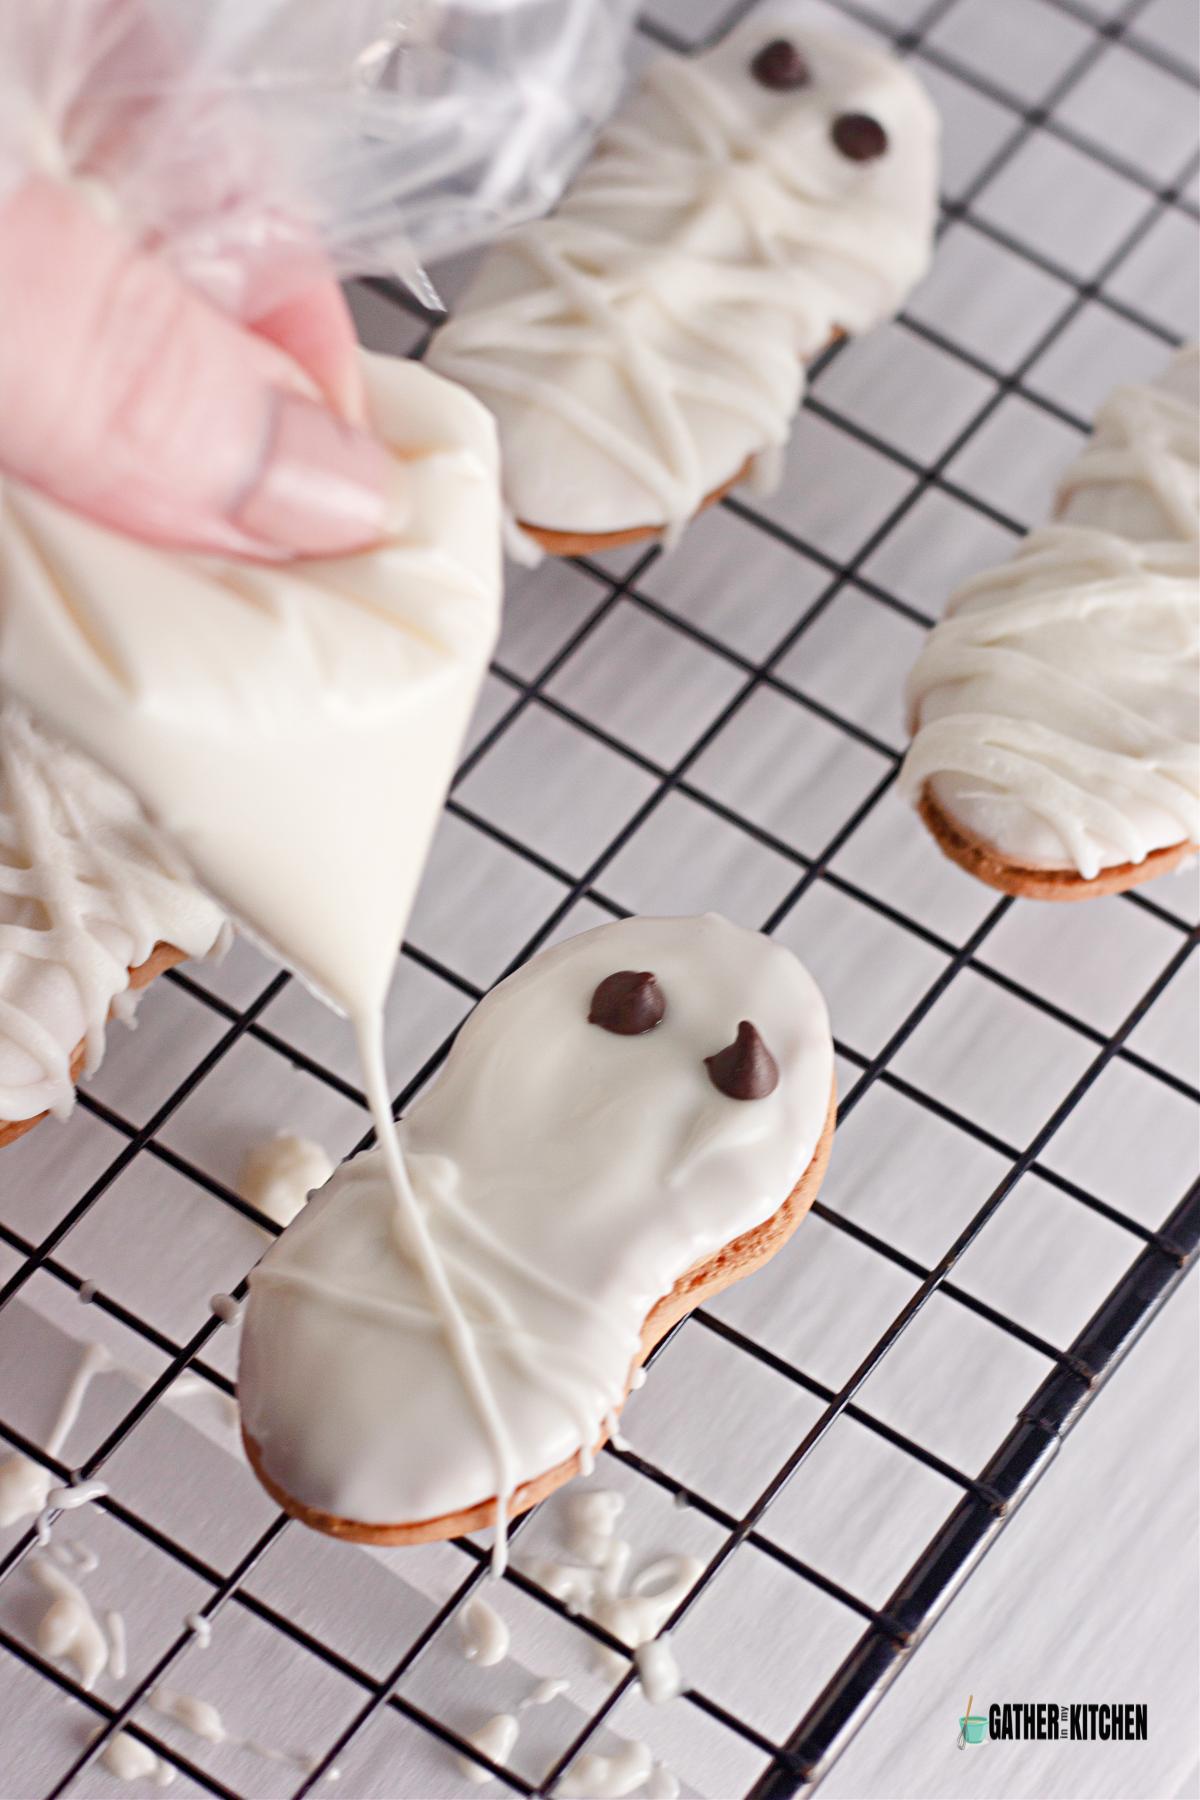
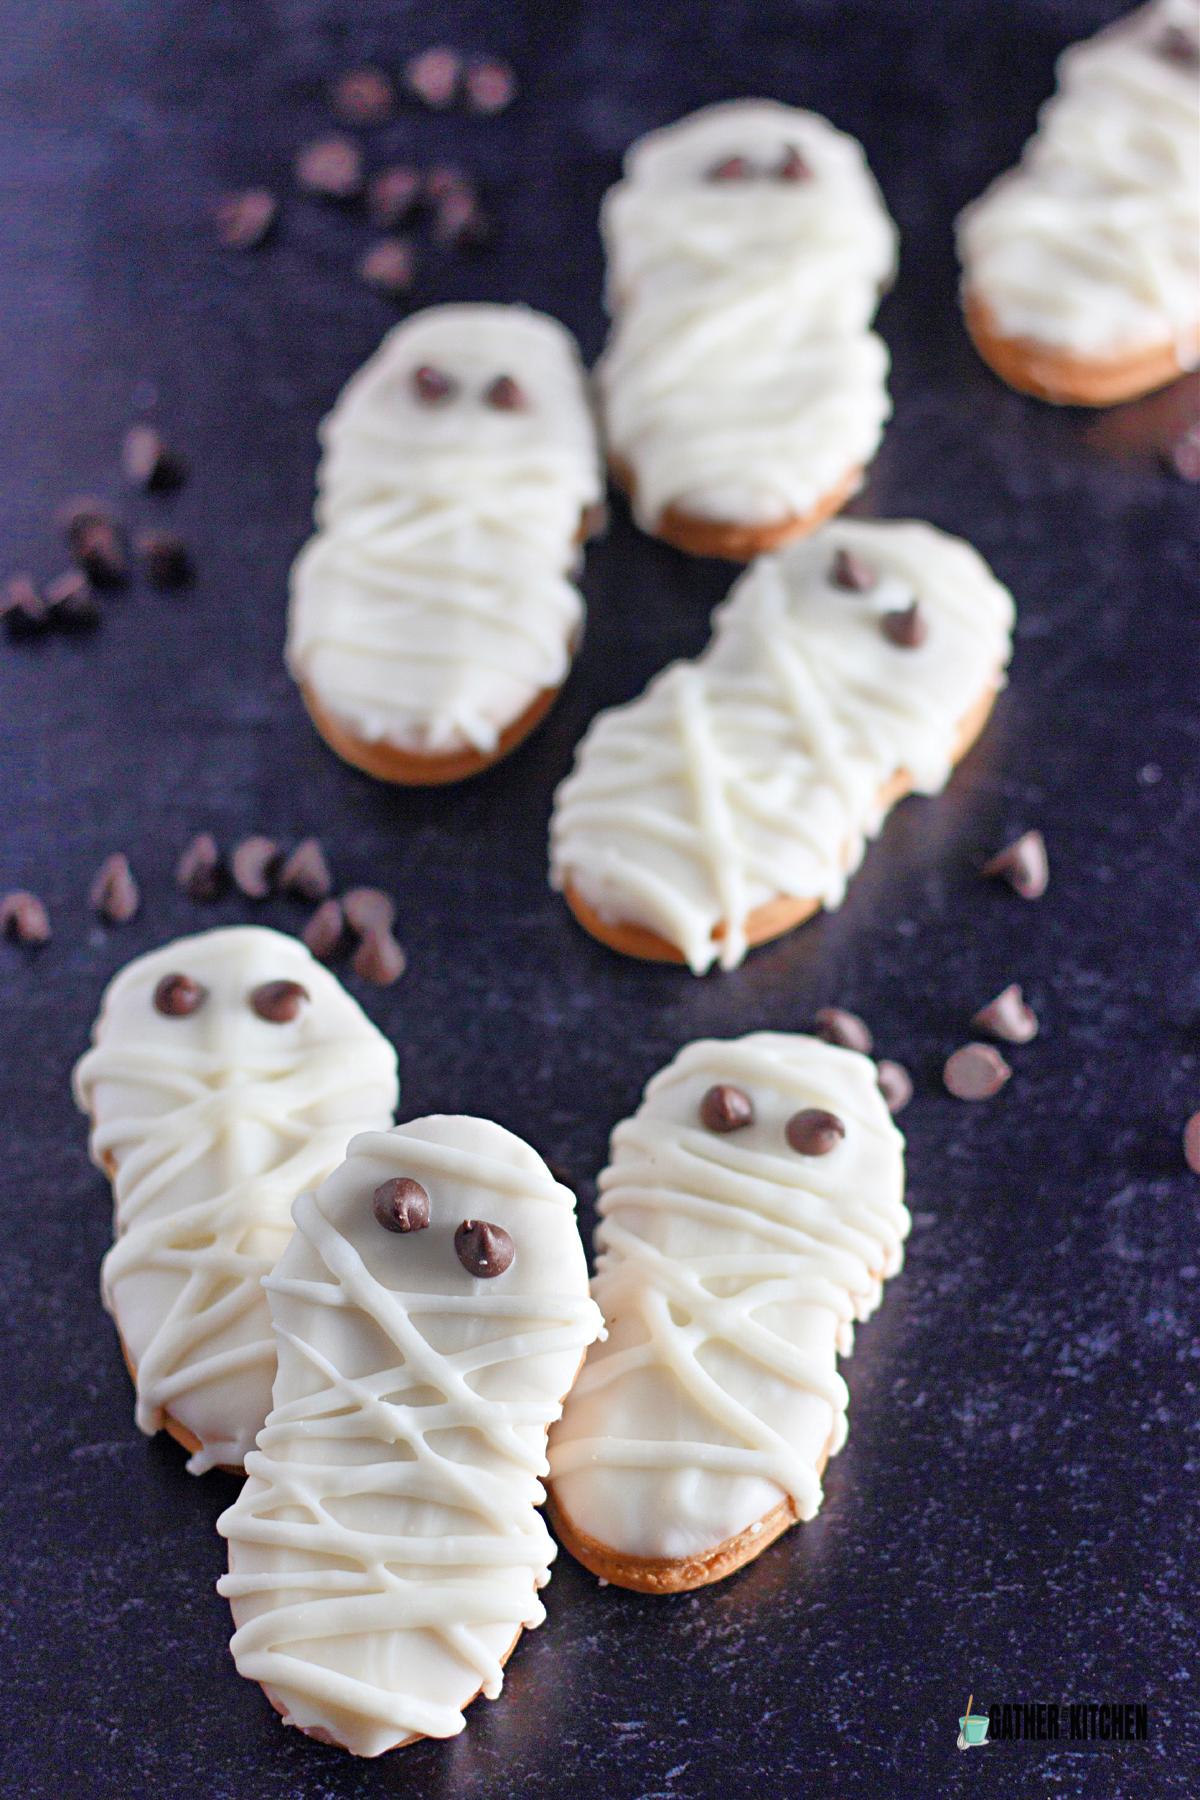
To Make Mummies
Once the coating is fully set, it's time to create the mummy details. Use the piping bag to draw crisscrossing lines of coating on the mummy cookies to resemble wrappings. Allow all cookies to finish setting before enjoying.
The adorable mummy and ghosts are fun Halloween snacks for both kids and adults.
More Halloween Recipes
Halloween Witch Hat Cookies
Jalapeno Popper Mummies
Halloween Muddy Buddies
Skeleton Veggie Tray
Tips
Here are some tips for making the best mummies and ghosts:
- Melting Chocolate: When melting the candy coating, always follow the package directions closely. Overheating can cause the chocolate to seize or become grainy. Using short intervals and stirring frequently helps achieve a smooth consistency.
- Eyes: You can use mini chocolate chips as we did for making these or, you can use little candy eyeballs or even small dabs of dark chocolate as an alternative.
- Working in Batches: Since the candy coating sets fairly quickly, work in small batches. This helps to make sure that the chocolate remains workable and the decorations adhere properly.
- Storage: Store the finished cookies in a cool, dry place in an airtight container. If stacking them, place parchment paper between layers to prevent sticking.
- Get Creative: Feel free to add your own twist! Consider using colored candy melts for added flair or experimenting with different designs and patterns.
Leftovers
Here's how to store leftover Halloween Nutter Butter Mummy & Ghost Cookies:
- Cool Before Storing: Make sure the chocolate has completely cooled and set before storing.
- Airtight Container: Place the cookies in an airtight container, separating layers with parchment or wax paper to prevent them from sticking together.
- Refrigeration: Storing these cookies in the fridge will help the chocolate stay firm.
- Avoid Stacking When Wet: If the candy coating on the cookies hasn't fully set, avoid stacking them. Once the coating is firm, they can be stacked with parchment paper in between layers.

Halloween Nutter Butter Mummy & Ghost Cookies
Ingredients
- 16 ounces vanilla candy coating or white melting chocolate
- 16 ounces Nutter Butter Cookies family size package
- 2 Tablespoons mini chocolate chips
Instructions
- Melt the white chocolate candy coating according to the package directions. Scoop about ⅓ cup of the melted candy coating into a small zip-top bag and set aside (you may want to place the bag in warm water to keep the candy from setting up).
- Dip one side of each Nutter Butter cookie in the melted white candy coating. For ghosts, only dip about ⅔ of the one side, leaving ⅓ un-dipped at the bottom. Place the dipped cookies on a wire rack to allow any excess candy to drip away.
- Use scissors to trim a very tiny bit from one corner of the plastic bag that contains the melted candy coating. This will make a simple piping bag.
- Before the candy coating sets, make your ghosts by piping a little of the candy coating along the bottom edge of the dipped portion of the cookie to make the ghosts appear to be floating on the cookie.
- Next, use mini chocolate chips to create eyes and a mouth on each ghost cookie and just eyes on the mummy cookies.
- Once the candy coating on the cookies has fully set (meaning, it is firm to the touch and no longer melted), use the piping bag of melted candy coating to pipe lines across the mummy cookies in different directions to resemble mummy wrappings. Allow the candy coating to set at room temperature before serving.
Notes
- Tools needed for this recipe are a zip-top plastic bag and scissors (or a piping bag, but I didn’t want to clean chocolate out of mine), wire cooling rack (not essential, but makes it easier to avoid pools of the chocolate forming around the edges of the cookies).
- The only white chocolate that will work for this recipe is the kind meant to be melted. White chocolate bars and chips do not melt smoothly. I like the vanilla candy coating that comes in its own microwave-safe tray (found at Kroger or Walmart).
- Because the candy coating sets fairly quickly, I suggest making the cookies in small batches. I made 6 mummies (without the piping on the mummy wrappings), then 6 ghosts, and then repeated this process until I had all the cookies made. Finally, I piped on the “mummy wrappings” very last and let all the cookies set until the candy was firm.
- It’s best to wait until the candy coating on the cookies has fully set before adding the “mummy wrappings.” Otherwise, the stripes for the “wrappings” just melt into the dipped layer and you won’t get the cool 3D effect.
- Candy eyes can be used instead of chocolate chips.
Leave a Reply